 |
BAY AREA BLITZKRIEG |
 |
||||||||
| Located in the Tampa Bay area of Florida,Bay Area Blitzkrieg RC model tank club is a organization for those who have radio controlled operational scale model armor. We welcome both experienced and new people in this hobby as well as those in need of help getting started. | ||||||||||
|
|
|
|
|
|
|
|
|
|
|
|
| All photos and text are Copyright (C) Bay Area Blitzkrieg 2023 | ||||||||||
Bay Area Blitzkrieg Projects
About this page:
This page is devoted to projects that affect the club as a whole. They very well might be something
from a member but can be used for all on our meet site. One example is the bridge.
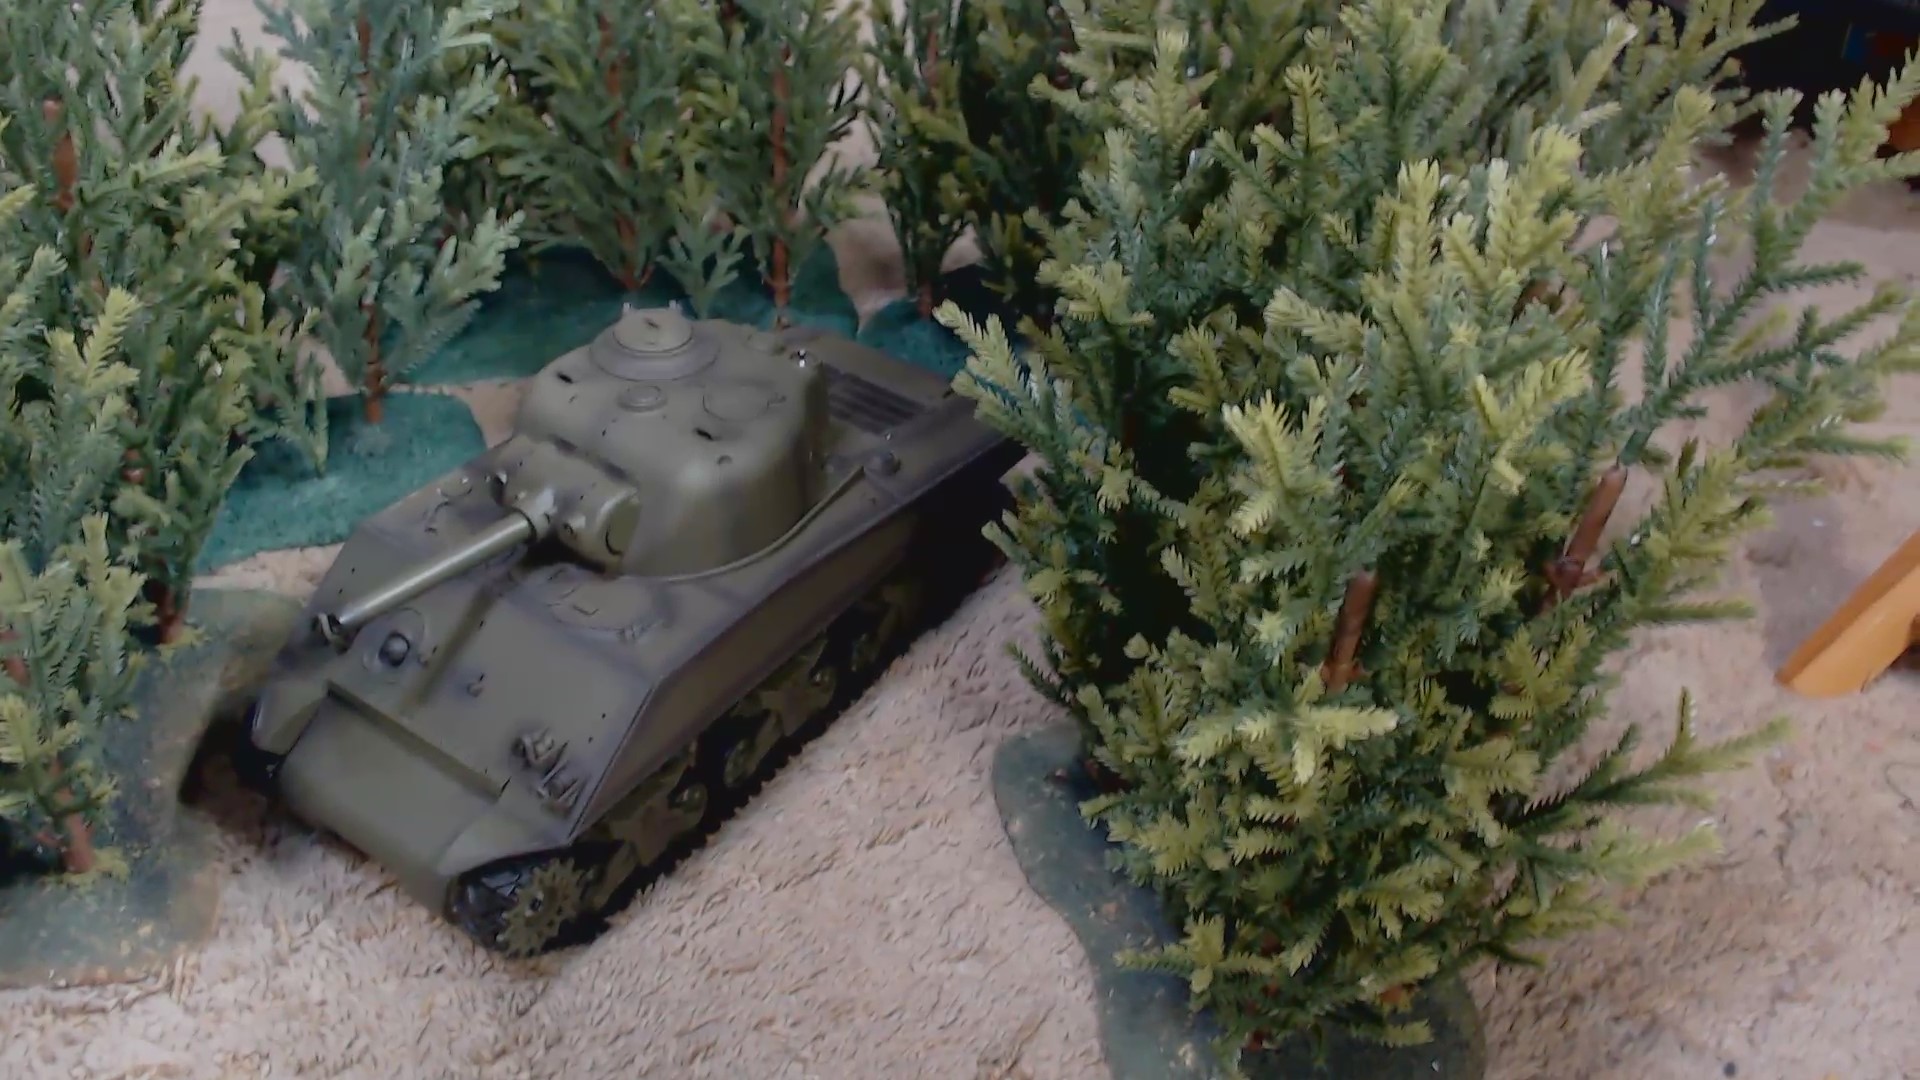
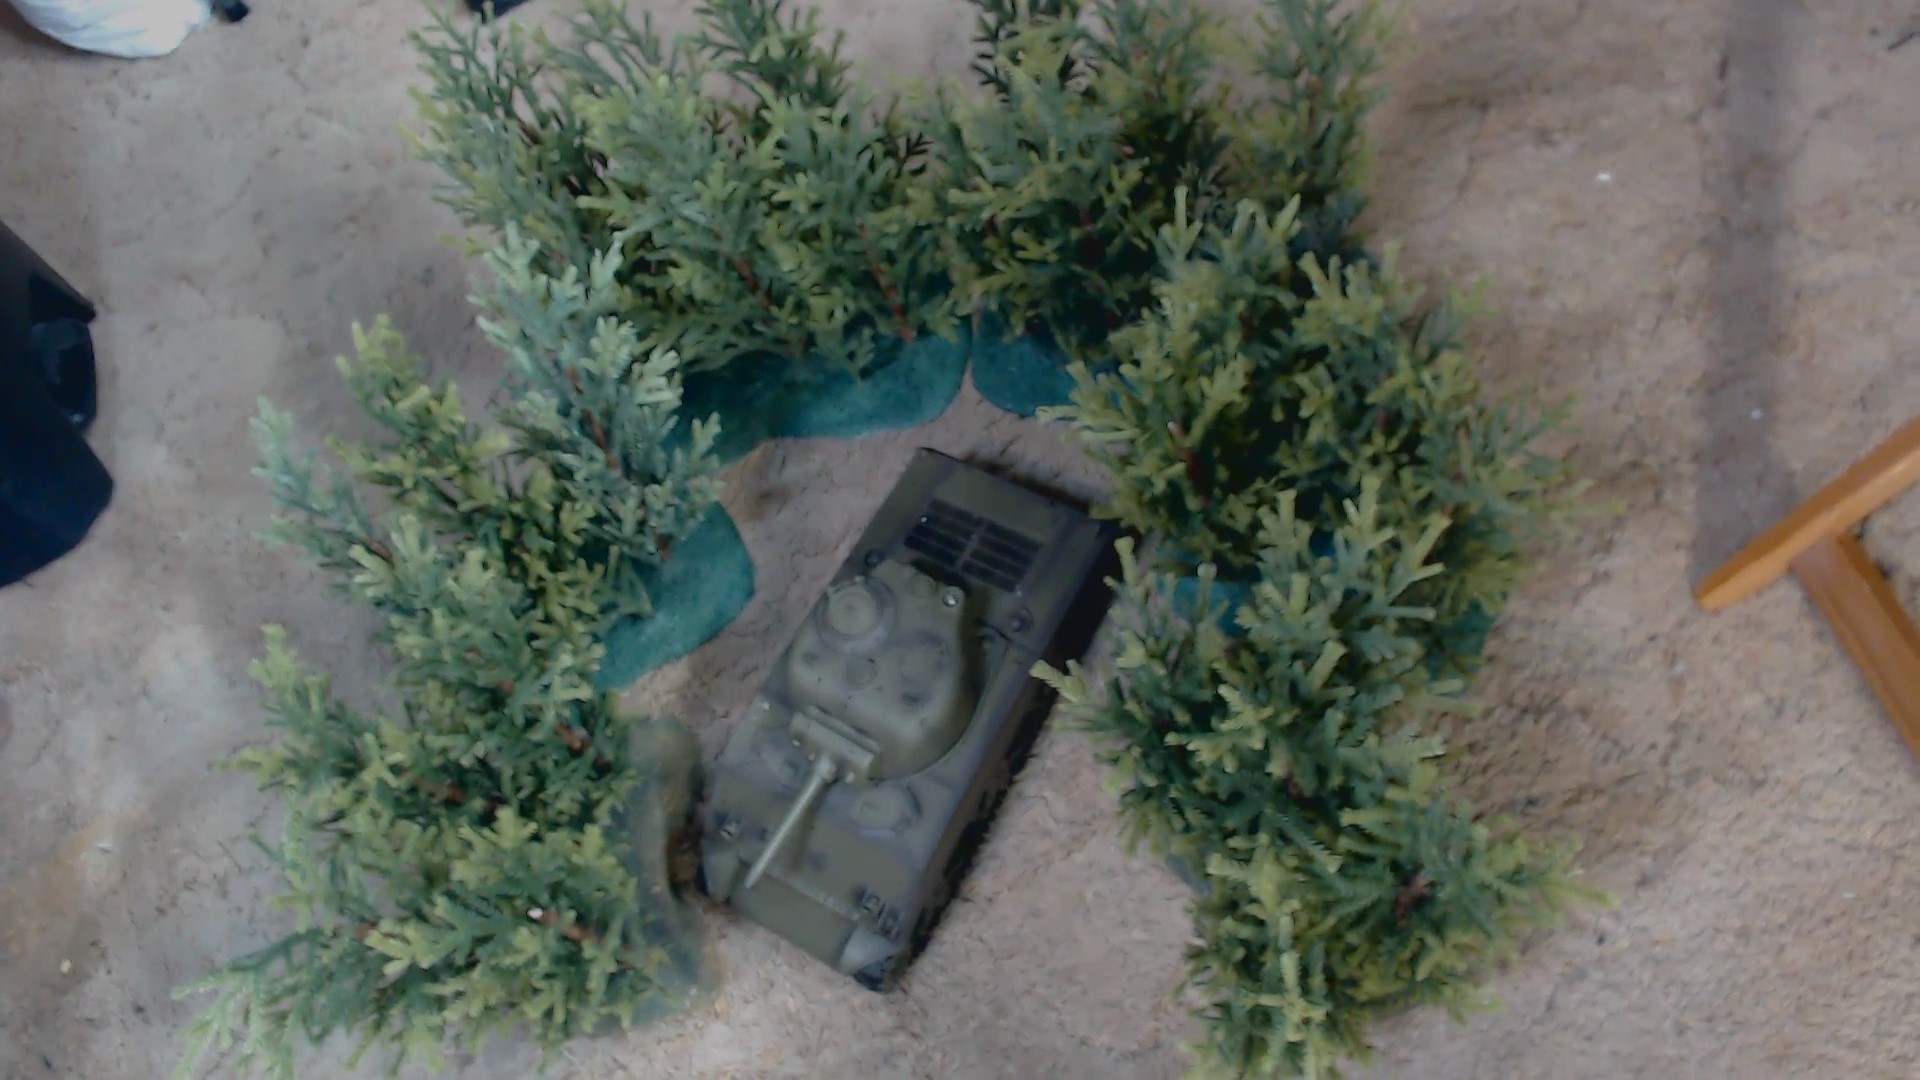
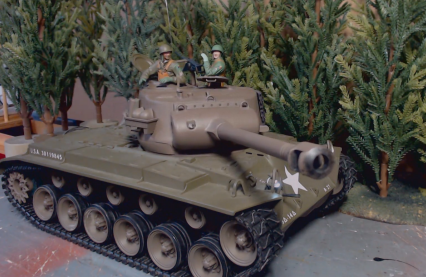 Tree
Stands (def: a small stand alone grouping of trees)
Tree
Stands (def: a small stand alone grouping of trees) Here is a video (by Lew) on making a "Tree Stand" using small 16-17 inch tall plastic trees usually sold at Christmas time. The best prices are during the
after Christmas clearance sales. These trees were originally $5.00 each at Target and on December 29 they were $.50 each, 10% of the original cost.
The tree(s) have a heavy wire inside the trunk. They can be removed from the stubby wood base and stuck directly in the ground. However, making a Tree Stand is easy and portable. By making a variety of Tree Stands in different sizes and configurations one can make a small forest diorama often needed for tank meets. This can break up open areas and simulate some of the scenes where WWII tanks operated.
Video Link: [Tree Stand]
How many trees to make a small forested area?
In the photos below there are 27 full "trees" (total) , some of them trimmed a little shorter in a total of six "stands." There are also some small "trees" made from the branches of trimmed trees in each "stand."
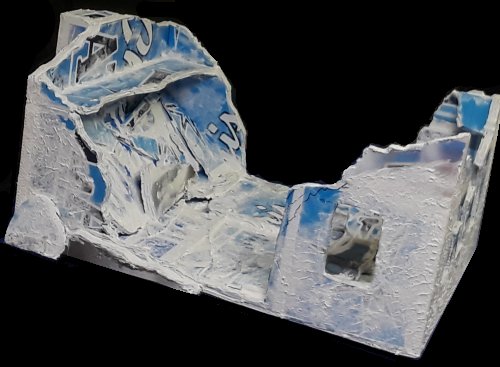
Bombed Building (1/16 scale) (Coming
soon)
 When constructing
building, homes, factories, stores, etc., it is vey important to
THINK BIG.
Many will fail to recognize that the tanks are really much smaller
than they are. We see tanks as massive vehicles, and yes, they
are very heavy but size wise they are not all that big. Think
of the M1 Abrams tank. The hull is 26 feet long by 12 feet
wide by 8 feet high (with turret). Now think of a room that
size. That is about the size of a good size living room and
slightly bigger than a one car garage. So why construct a
home or other building about the size of a tank? The M1 is 312
square feet of surface area. Even a small home with a one car
garage is going to be a total of at least 1,400 square feet (or
about 37 inches square at 1/16 scale.
When constructing
building, homes, factories, stores, etc., it is vey important to
THINK BIG.
Many will fail to recognize that the tanks are really much smaller
than they are. We see tanks as massive vehicles, and yes, they
are very heavy but size wise they are not all that big. Think
of the M1 Abrams tank. The hull is 26 feet long by 12 feet
wide by 8 feet high (with turret). Now think of a room that
size. That is about the size of a good size living room and
slightly bigger than a one car garage. So why construct a
home or other building about the size of a tank? The M1 is 312
square feet of surface area. Even a small home with a one car
garage is going to be a total of at least 1,400 square feet (or
about 37 inches square at 1/16 scale.However, in constructing a building we are limited to size because of portability and storage. So a happy medium needs to be met. THINK BIG but not too big. The most common political poster-sign is 24" by 18" giving a full size equivalent of 32 feet by 24 feet, or 768 square feet in size. This section is the basic idea for constructing that 24" by 18" building.
Photo, Right. The building has an opening for a tank to run right through the center. There is evidence of a second floor where pieces of it still exist. This is yet to be painted and some more debris to be added.
Step- by step instructions (with photos) on building a 1/16 scale bombed and burned out building made from roadside election poster-signs. Materials include: &
- Poster-signs, corrugated plastic 18" by
24" by about 1/4 " thick. (12 signs used in this example.)
- Glue gun and glue sticks
- Hot knife (one source is Harbor Freight)
- Cutting knife
- Ruler (long)
- Straight edge or ruler (at least 24" long)
- Caulking (DAP Painters Acrylic Latex - $1.50 each at Wal-Mart) (3 tubes used in this example)
- Paint
*****Progress photos to be added*****
- Glue gun and glue sticks
- Hot knife (one source is Harbor Freight)
- Cutting knife
- Ruler (long)
- Straight edge or ruler (at least 24" long)
- Caulking (DAP Painters Acrylic Latex - $1.50 each at Wal-Mart) (3 tubes used in this example)
- Paint
*****Progress photos to be added*****
First thing to do is plan your building by sketching what you want it to look like. Look at the German farmhouse for some basic dimensions. You can also look at real buildings, make some measurements and of course divide by 16.
Most of the rest is up to you. Start constructing the building then cut your openings or make the pieces first then assemble them. Tips:
- For the base I would use two layers of the plastic signs.
- For exterior walls that simulate brick, concrete block, or poured concrete use multiple layers. The plastic sign is about 1/4" thick which is 4 inches thick full size.
For a 8" thick wall you will need two layers of plastic, and a 12" thin0k wall you will need three layers.
- When using multiple layers overlap the for strength.
- Use scrap pieces to simulate broken pieces of the structure.
- Use the caulking to fill in the corrugated edges of the plastic material.
- Use the caulking to smooth areas like built up dirt (painted later) and apply to surfaces for a textured finish by smoothing on then stipple with an old paintbrush.
Paint to your choice. For this structure I used some basic interior colors but most of it is flat black to indicate the building being burned.
Any concrete flooring could be gray, wood flooring whatever wood
color(s) you want. The outside could be a combination of red
brick covered with stucco. The red brick showing through the
broken off stucco with the stucco being gray, white , or whatever
color you think is appropriate. Some flat black indicating
burned areas (especially over the windows and openings) would look
good. Then some light/medium brown or tank for dirt blown in
over time. Maybe even some plants growing. Optional:
Make some burned roofing that collapsed in or some I beams, perhaps
twisted by heat colored black with rust.
- For exterior walls that simulate brick, concrete block, or poured concrete use multiple layers. The plastic sign is about 1/4" thick which is 4 inches thick full size.
For a 8" thick wall you will need two layers of plastic, and a 12" thin0k wall you will need three layers.
- When using multiple layers overlap the for strength.
- Use scrap pieces to simulate broken pieces of the structure.
- Use the caulking to fill in the corrugated edges of the plastic material.
- Use the caulking to smooth areas like built up dirt (painted later) and apply to surfaces for a textured finish by smoothing on then stipple with an old paintbrush.
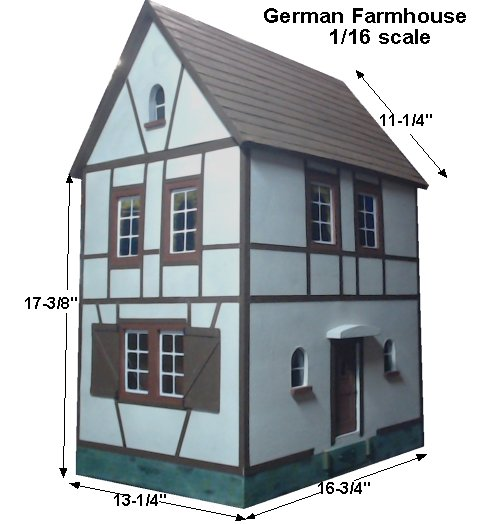
German Farmhouse (1/16 scale)
 One of the most difficult thing about RC tanks is to comprehend the size of structures. We all think of the tanks as being massive, and
they are, but in their own right. Think of a tank sitting in your driveway. Compared to cars, they are massive. But
buildings? Not quite so. One might actually think of buildings as being much smaller than they are in 1/16 scale.
One of the most difficult thing about RC tanks is to comprehend the size of structures. We all think of the tanks as being massive, and
they are, but in their own right. Think of a tank sitting in your driveway. Compared to cars, they are massive. But
buildings? Not quite so. One might actually think of buildings as being much smaller than they are in 1/16 scale.To aid in developing buildings this article will focus on some dimensions to consider. In this example, this building (not taken from any particular building) was built using 3/16 inch thick foam board fastened together using a hot glue gun.. Areas around the windows and doors have a double thickness as 3/16" at full scale would be 3" - much too thin for a wall or at least the setback (depth) of the windows and doors. The roof is removable for storage.
The dimensions are derived from using current U.S. standard sizes for homes. That should be close enough for modeling buildings like this.
As for the exterior doors, these are 2-3/8" wide by 5-1/16" high. The single windows (2nd story) are 2-1/8" wide by 3-3/8" high. All of this is the actual openings cut in the walls.
The brown trim is heavy white cardstock. The roof is a "rolled shingle" - strips of white heavy cardstock. The large windows on the first floor are clear as there are photos about an inch in showing some interior. The second story windows were printed on glossy photo paper with the white areas and drapes/curtains being colored in a paint program.
The base of the building is painted in several shades of gray with outlines depicting the mortar joints in the "stonework".
This model is representative of various photos of German farmhouse found on the internet. As there were thousands of farmhouses or other buildings, don't limit yourself to model one particular one.
Sure, there is a lot of detail here, but I wanted this to be part of a diorama that would serve as a U.S. Armored Command headquarters. There is a surrounding fence and barn.
German Barn (1/16 scale)
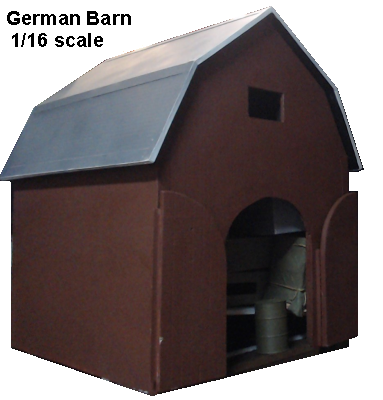 "This German Barn" was designed to fit inside of the Farmhouse (above) to ease transportation and storage. It was designed using the
same criteria as above. The roof is removable to store other "props" inside of the barn for transportation and storage.
"This German Barn" was designed to fit inside of the Farmhouse (above) to ease transportation and storage. It was designed using the
same criteria as above. The roof is removable to store other "props" inside of the barn for transportation and storage.However, the materials are slightly different. The barn wall and roof were made using political signs (after the elections were over), the corrugated plastic type. The doors were made using balsa wood giving a wood grain finish, plus the balsa was scored to simulate planking. The corners and edges were covered with heavy cardstock to cover the corrugations in the plastic. Again, the hot glue gun was used to fasten it together.
The inside was painted black so it was not too noticeable as the doors were cemented in the open position. The outside was painted with Bull's-eye 123 primer then two coats of red spray paint.
There are many types and shapes for German barns, so this is a mixture of those and some of the American barns which were influenced by German emigrant farmers.
"Stone" Bridge (1/16 scale)
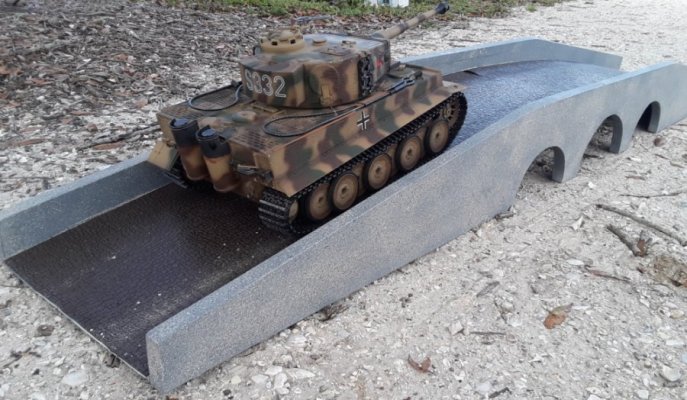 At
the right is a photo of the Stone Bridge build for the BAB club.
It is five feet long and 11-3/4-inches wide road width (between the
walls). Somewhat of a squeeze for the tanks, but even the M1
Abrams and the King Tiger tanks will fit. After all, these
bridges were built "long before" tanks came into existence.
At
the right is a photo of the Stone Bridge build for the BAB club.
It is five feet long and 11-3/4-inches wide road width (between the
walls). Somewhat of a squeeze for the tanks, but even the M1
Abrams and the King Tiger tanks will fit. After all, these
bridges were built "long before" tanks came into existence.The side wall are made of regular 3/4-inch thick wood and the doorway is made of Masonite (hardboard). All of it is cemented together with Titebond II. It has several coats of paint to prevent water damage. First coat(s) are Bullseye 123 primer. Next two layers spray of gray spray pain. Black was sued on the bottom. Finally, a coat of "stone" pattern paint. This was very hard to use, expensive and took two cans to finis the bridge sides.
The roadway is vinyl from Michaels and cemented on with 3M Super 77 adhesive. Unfortunately, the vinyl shrank and requires filling the gaps.
It is durable enough for all of the tanks but not for a person to stand on. I usually transport it in my SUV placing the tanks on the roadway.
12/31/2020